
More: How to add new Software Sources
A full list of all available sources can be found on page 7.
One of the great advantages of Linux distros over other operating systems is your ability to not just have a Software Center with lots of apps that all get automatically updated, but that you can add more sources, thereby not just downloading software, but make sure it’s always updated. And with many possible sources for your Software Center, you can be sure there’s never a single entity deciding what you can see and what not. However, there’re possible caviats in user-friendliness that aren’t yet figured out .
The ways to add the different available sources are all in the same settings window an generally easy to understand. However, some developers decided to use system package repositories and just write a few terminal commands for people to add it, expecting every Linux user to be advanced enough.
To mitigate this and take some anxiety about the terminal you can find a short introduction into it on this page.

Add new sources on your distro


Add PPAs:
→ “PPAs“
Add System Package Repositories:
→ “Authentication Keys”
→ “Additional Repositories”
Add Flatpak Sources:
Additional sources not supported yet. (Nov ’22)

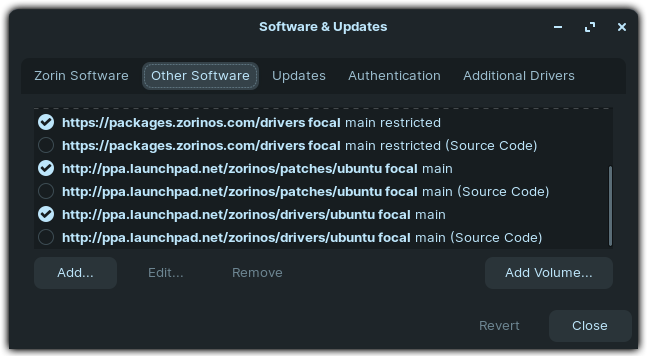
Add PPAs:
→ “Other Software”
Add System Package Repositories:
→ “Authentication”
→ “Other Software”
Add Flatpak Sources:
Additional sources not supported yet. (Nov ’22)

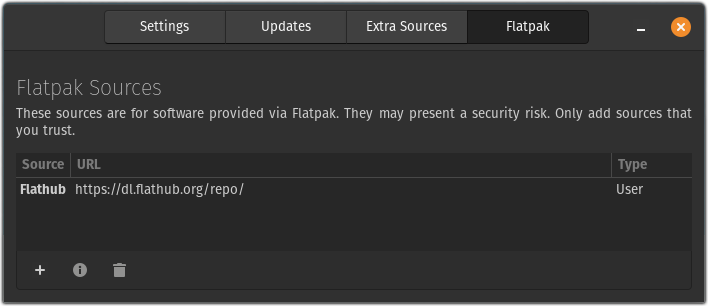
Add PPAs:
→ “Extra Sources”
Add System Package Repositories:
Currently borked (Nov ’22). Use CLI commands below.
Add Flatpak Sources:
→ “Flatpak“
When they give you CLI commands…
In most cases when you find some tool online that gives you a “deb repository”, it will provide you a few lines to copy them into a terminal. Of course this is the most simple way for developers since these commands are the same for all Linux distros of the same family (in our case the Debian/Ubuntu family), however it’s not really comfy for most users given how scary the terminal can be. Still, if you get something like this, it is the fastest to quickly copy the lines to your terminal.
Unfortunately, most tutorials omit that you have to enter those commands as root. For it to work properly, it is very easy to do this in your terminal first:
sudo suBy doing so you enter the so-called “root shell”, meaning everything you enter will be done without any restriction. Be very careful from now on.
Below are four commands you’ll often encounter when adding a third-party software sources. Let me decryptify them for you.

As you can see, it is very simple for developers and companies to just tell you “enter this” to make it work for everyone. However it is neither the only way to do it, nor the most obvious way from a users perspective. Luckily this way to distribute software is slowly becoming less and less relevant outside of system tools in favor of flatpaks.
Pingback:Great guide for folks willing to escape to freedom! – Thomas A. Besand
You could add hacktivista.com which is actually only shipping within Chile but is thinking on expanding to latinamerica.