
More: Permissions on Linux
The Linux permission system is something users are puzzled, amateur technicians frightened and professionals angry about on a regular basis. While you shouldn’t have any problems as long as you just use your computer daily and stay inside your home folder, if you have to apply some fix or install specific tools you might run into trouble with it. Let me try to break it down for you.
Never change file or folder permissions outside of /home, /opt or the place your Linux mounts drives into unless you know what you’re doing or are instructed to do so. If you don’t know what that means please read the two pages before this one.
What permissions are there?

On Linux, for each folder or file there are three different “categories” of permissions: Owner, Group and Other.
Ownership: This one obviously should be either you or, in case of system files, root. You’re able to take write permissions from yourselves to prevent mistakes, however as on Windows this usually only causes annoyance.
You usually shouldn’t need to change ownership of a file. In cases you have to there’s a workaround below.
Group: On Linux every user is also part of several groups Linux uses to manage what a user is allowed to do. If you create a file this is by default set to your very own, however you can also create own groups in the system settings. Let me give you an example how this can be useful:
Let’s say you have four accounts, two for you and your partner as well as 2 for your kids.
On an external drive is a folder with some adult entertainment.
You can create a group with you and your partner in it, then set the folder to this group and the setting for Other to “None”. Now only your two accounts are able to access that folder – as long as your kids’ accounts aren’t also system administrators, of course.
Other: As the name suggests, this will apply to anyone else who’s allowed to even look into the folder the file is in.
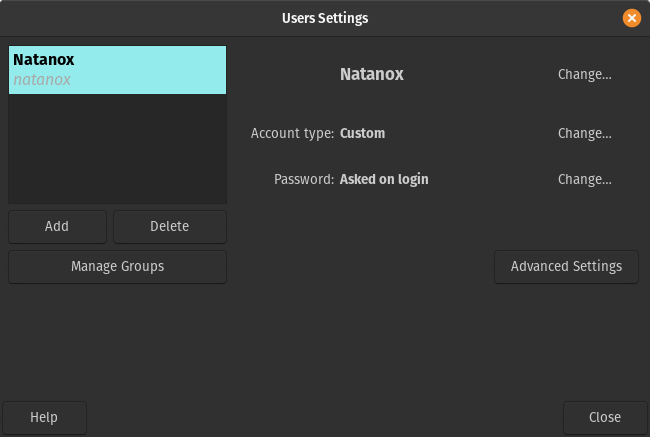
Where to find group permission settings

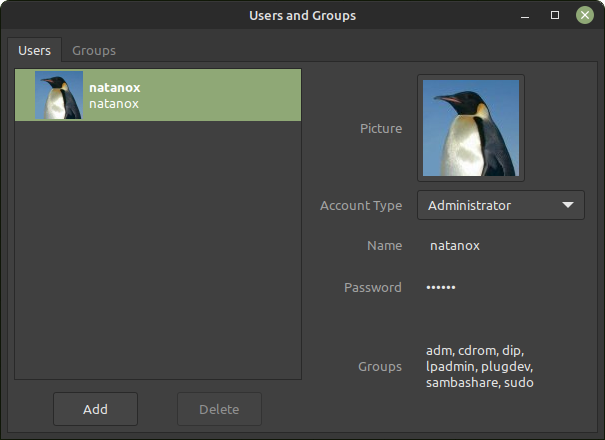

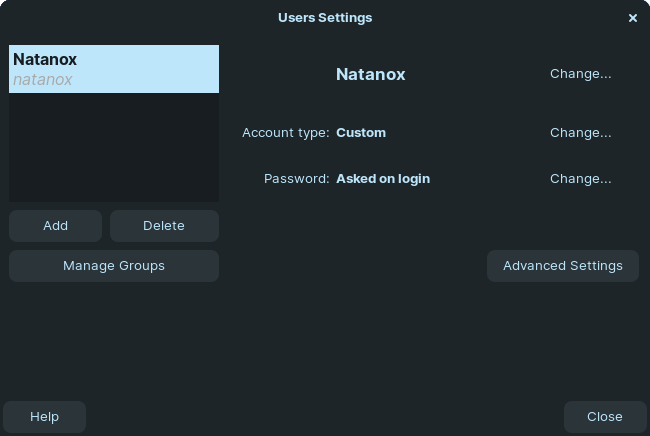
Due to bad design decisions of the Gnome desktop environment team you have to install an older version of “Users and Groups” from the Software Store.

Due to bad design decisions of the Gnome desktop environment team and an oversight of Pop!_OS you have to install this through the Terminal. Copy (CTRL + C) and Paste (CTRL + SHIFT + V) this into the terminal:
sudo apt install gnome-system-toolsHow to give yourself ownership
You might come into the uncomfortable situation that some file can’t be edited, moved or even be read. That may happen when you plug in an external disk that was previously used on another computer and the person made some wrong settings by accident, or when some app with root privileges copied files and forgot to give permissions back to the user.
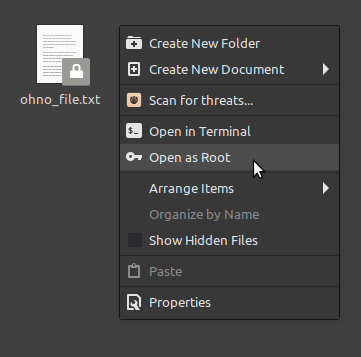
The solution to the problem is beautifully simple. By right-clicking somewhere in the folder you can “Open as Root“. This will open a new File Manager where you can do anything – including right-clicking on the file, go to permissions and set the owner as well as group to yourself. Just make sure to close the Root File Manager right after doing so – it is extremely powerful, and can therefore also be extremely dangerous if handled unproperly.
You can fix whole folder structures (including whole disks) like this.

On Pop!_OS we can use a nice trick to temporarily gain root privileges in the File Manager and change a files or folders ownership. To do so, open the File Manager and press CTRL + L to make the adress bar writeable. Now enter admin:/// and press enter – this will cause Pop! to ask for your password and throw you back into the root folder.
Now make sure not to use the left sidebar; this would throw you out of the admin privileges again. Navigate through the folders to the file you want to get ownership of and edit it in the file properties.
Make sure to click on some place on your sidebar once after doing so.


Unfortunately, to solve such a problem on any other distro than Mint, we are forced back to the terminal.
To do so, do a right-click in the folder where the file or folder you want to gain ownership of and select “Open in Terminal“. now write the following line, with your username and the filename.
sudo chown username:username filenameIf you want to become owner of a folder including everything within it, change the command to look like this:
sudo chown -R username:username filenameHere is a graphic to decryptify the command for you.

How the “chmod” CLI command works
This is a highly technical section and generally not necessary in daily usage.
If you ever need to set the permissions of a file or whole folders through the terminal, you need the command chmod. The syntax of its commands can be quite confusing given permissions are represented by numbers and single characters, so let me give you an immediate graphical representation of what it’s doing.

Now you might wonder how these numbers can represent those permissions. It is in fact a simple addition system:
| 4 | Read |
| 2 | Write |
| 1 | Execute |
By adding up these numbers you can set any kind of permission to each of the three users. A few examples:
- 421 – Owner can only read, group members can only write, Others can only execute.
(If the owner is also group member they could obviously do both, read and write) - 770 – Owner can read/write/execute, group members too, Others do not have any access.
- 653 – Owner can read & write, group members read & execute, Others write & execute.
(Permissions like this obviously make little sense in the real world)
Remember, all these permissions do not affect the root user – as root is always able to read & write any file. However, to execute something you sometimes still have to mark it as executable even after using “sudo”. To do so more quickly, you can use the +x parameter:
sudo chmod +x my_fileAnd, at last, you might want to change permissions recursively. The parameter for this is the same as with chown, namely -R:
sudo chmod -R 770 my_folder/If you need to manually navigate to a folder for these commands because your File Manager is dysfunctional, page 28 gets you covered. However you can always enter full paths to a folder or file while using chmod or chown.
Pingback:Great guide for folks willing to escape to freedom! – Thomas A. Besand
You could add hacktivista.com which is actually only shipping within Chile but is thinking on expanding to latinamerica.