
Explore Linux from a USB stick
The best way to get a feeling for something is to try it out yourself. With Linux this is especially simple as every major distribution can boot directly from a USB stick into a working desktop – no installation required. It won’t change anything about your computer until you start the installation process, which of course you don’t need to do!
This way you can also check out whether or not all your devices are supported by default, as most drivers are part of the system in Linux and don’t need to be downloaded separately. External hard drives, USB sticks, keyboards and mice fortunately are standardized and therefore will basically always work. Same goes for printers on your network, most often they’ll show up automatically with no further configuration required. However, given a lack of support from major brands for end-user hardware, there might be more specialised or proprietary devices you already own that don’t work out-of-the-box like wifi sticks or game controllers. In that case you get the opportunity to look for driver support before taking any permanent steps.
Below are instructions on how to put the .iso files you get from any distributions’ website on your USB stick and boot from it.

Ventoy (Windows, Linux)
- Download Linux distributions you want to try. Use the previous page as guide if you’re unsure.
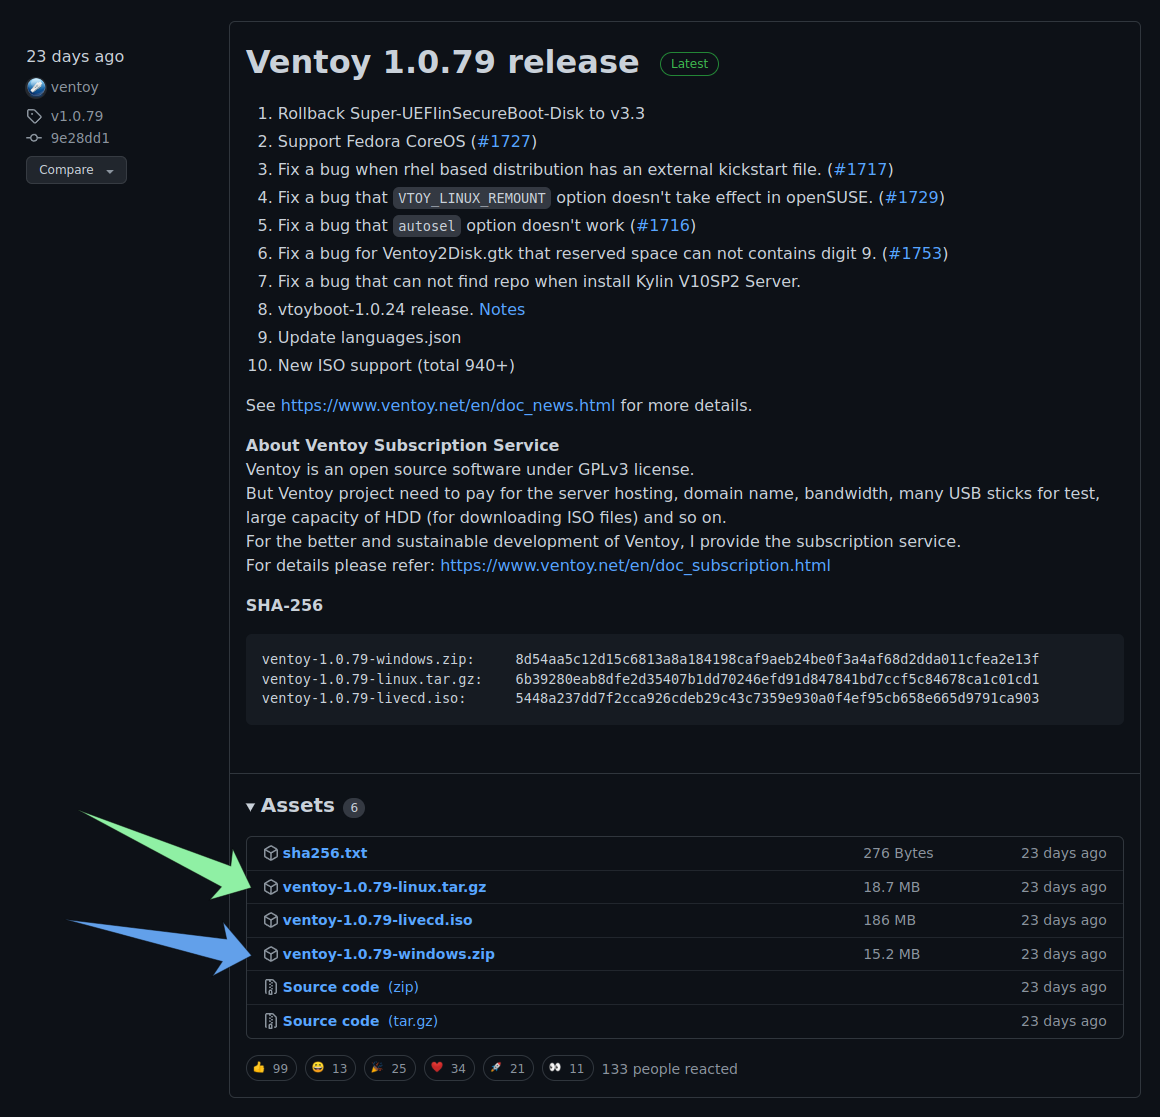
- Download the newest version of Ventoy. The Windows version is started through “Ventoy2Disk.exe“, on Linux it’s “VentoyGUI“.
For modern systems start x86_64, old 32-bit systems need the i386 executable.
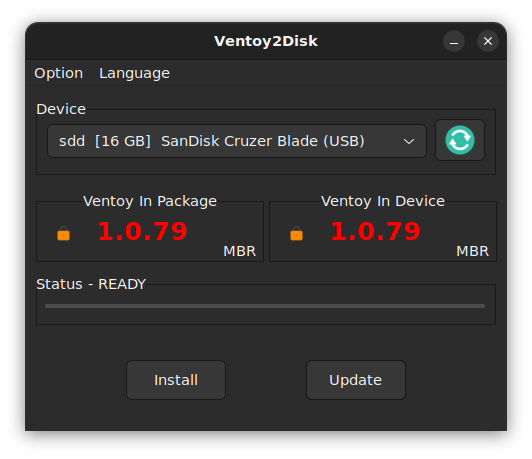
- After starting the tool simply pick the device you want to use (Everything currently on it will be overwritten!) and click “Install”.
- Take a look into your File Explorer. You should see the stick now being called “Ventoy”. Now, take all the iso files you downloaded (yes, you can copy and test multiple at once!) and copy them onto the stick. They will later show up with their file names, feel free to rename them to your liking.

Mac
- Due to a lack of options on Mac we will use Balena Etcher to create the stick. Download it here.
- Install and start Etcher. Inside the program press “Select Image” and choose a distro you want to flash. Other than with Ventoy you unfortunately can’t pick multiple simultaneously.
- Select the USB drive to use and click “Flash!”. (Everything currently on it will be overwritten!)
Prepare your computer
On computers that come with Windows a measure called “Secure Boot” is enabled by default. This feature is mostly controlled by Microsoft and native support by Linux distributions therefore relatively low. And while Linux Mint as well as Zorin OS do support it, some things like the nvidia graphics driver might refuse to work with it enabled. You therefore likely need to disable it in order for Linux to work on your device.
This of course doesn’t apply if you buy a device from one of the manufacturers you can find on the next page.
To disable Secure Boot do the following:
- On Windows 10, press and hold the SHIFT key while clicking on “Restart”. Release the key as soon as a menu appears. Choose “Troubleshoot”, then “Advanced Options”, and in there “UEFI Firmware settings”. If it offers you to restart, click on it.
- On Windows 11, press and hold the SHIFT key while clicking on “Restart”. Release the key if he tells you to “please wait”. After a short while he might ask you to choose your keyboard layout. After that choose “Troubleshoot”, then “Advanced Options”, and in there “UEFI Firmware settings”. If it offers you to restart, click on it.
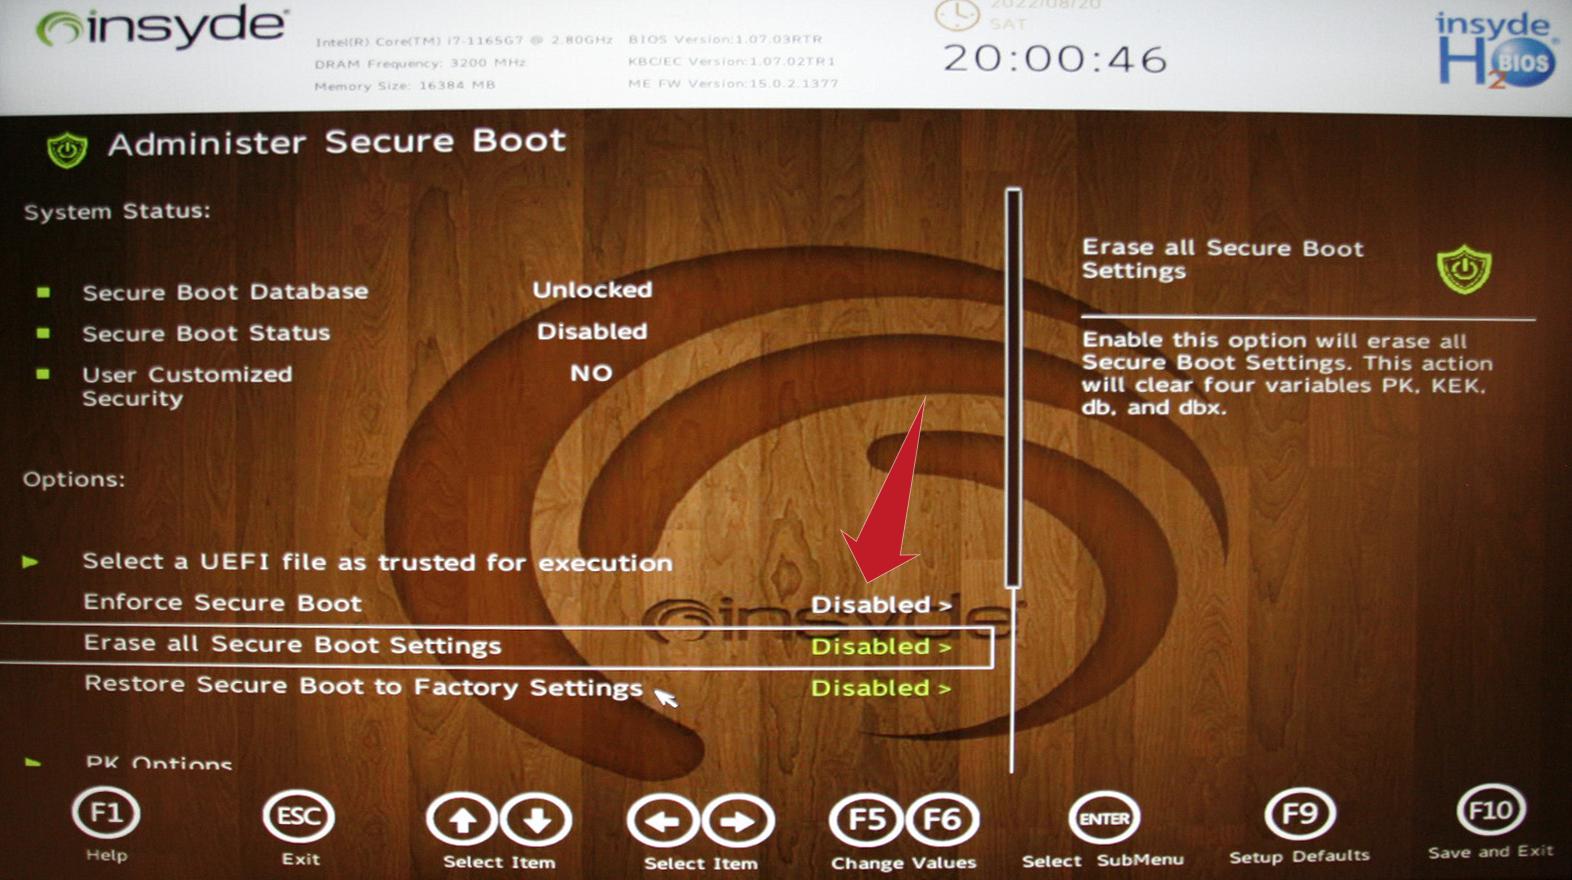
- Inside the UEFI you have to find the “Secure Boot” option. Unfortunately every manufacturer does their own thing in here, but most often you’ll have to press a key to enter “Advanced mode” (f.e. F2) and navigate to the security or boot options to find and disable it. Below are a few examples on how it may look like to you. You may also go into the Boot settings and set it so it will first try to boot from USB stick, then from disk / Windows Boot Manager (in that case you can skip the next step). Then save & exit the UEFI.
In some UEFIs you can’t straight up “disable” it, rather you can set it from “Windows” to “Other OS” for it to allow anything else than Windows to boot.

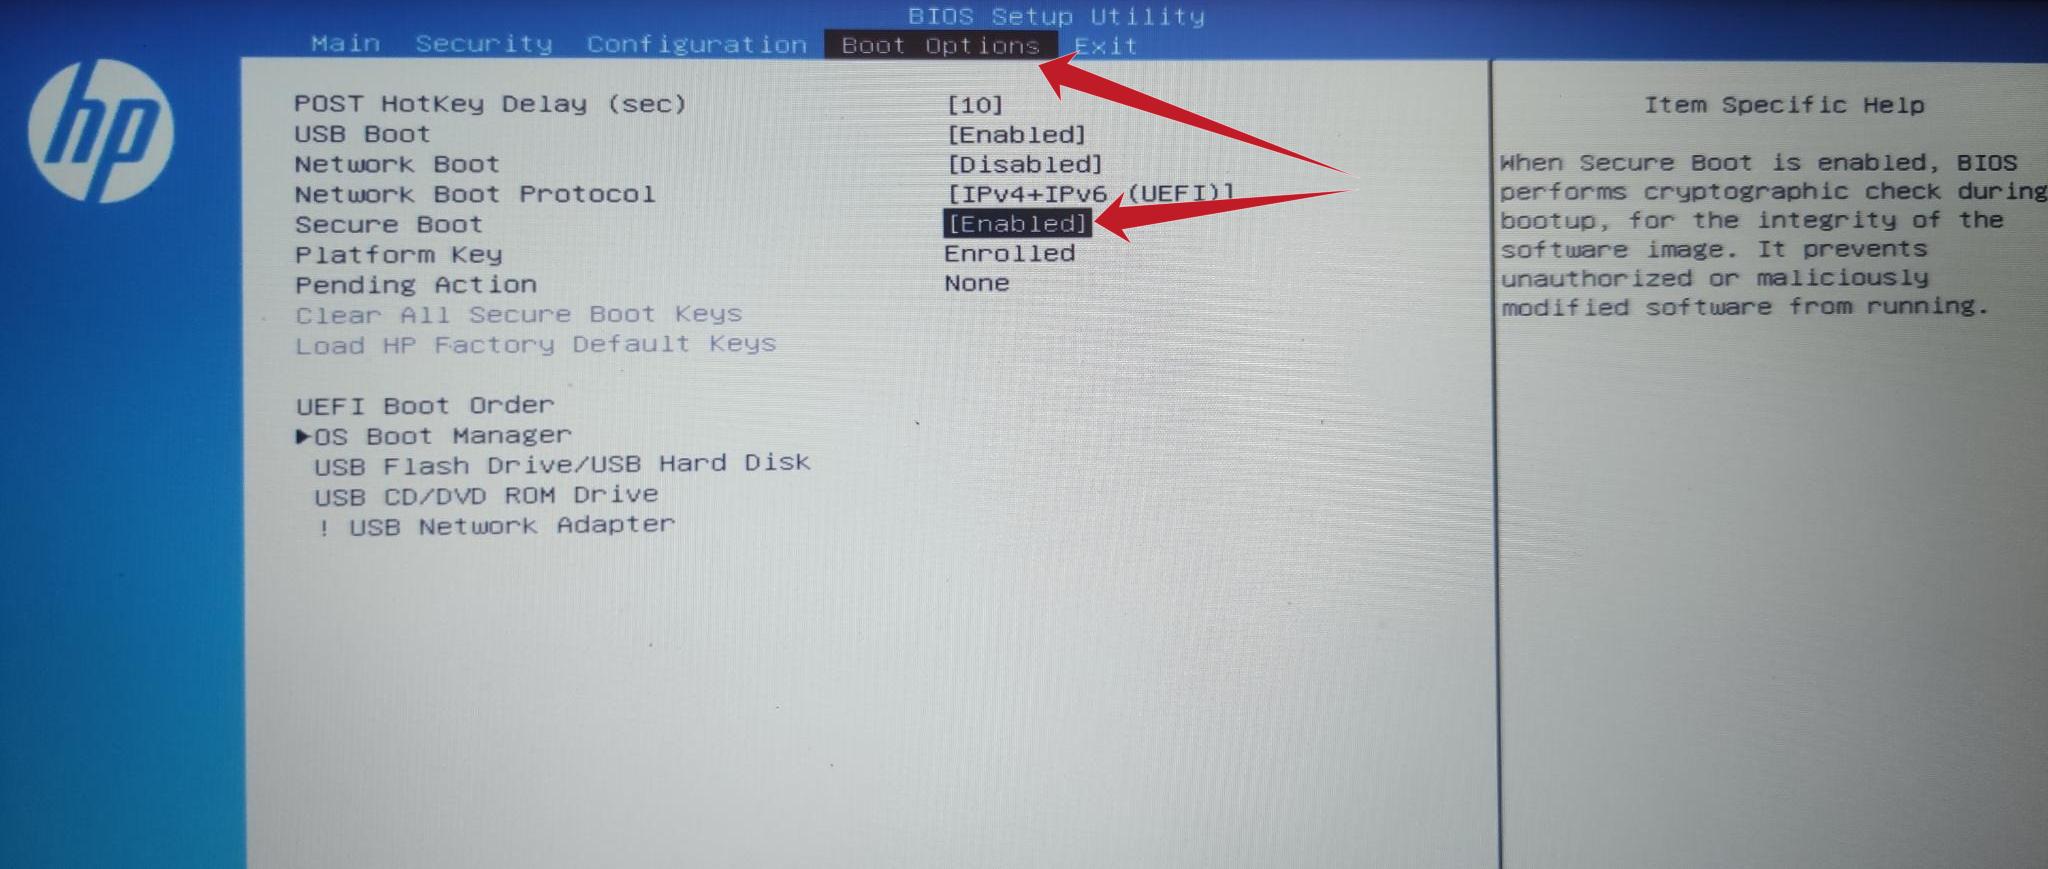
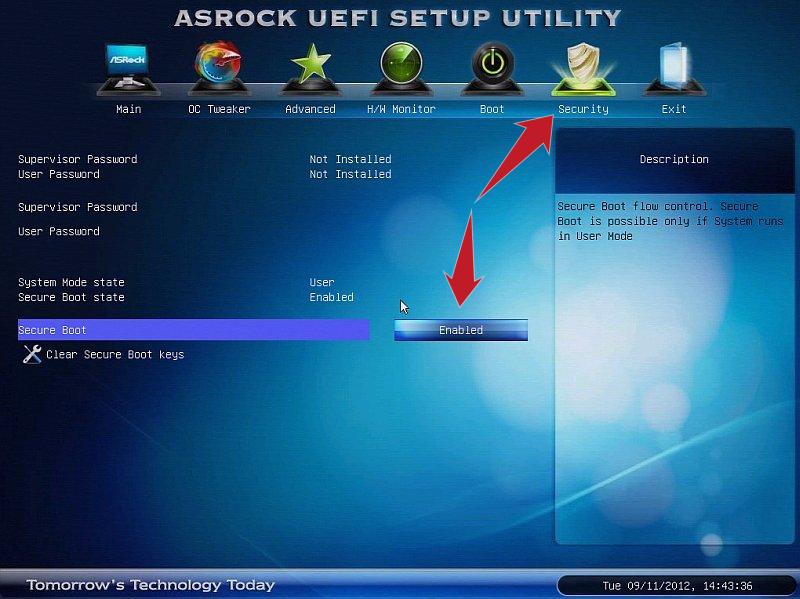
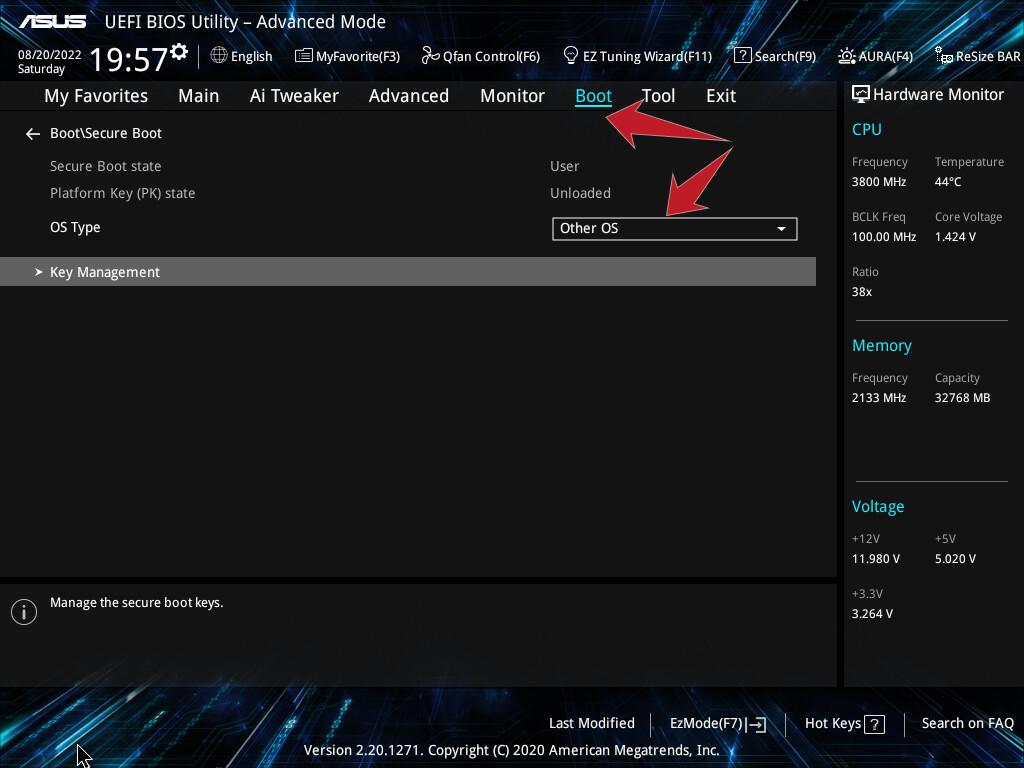
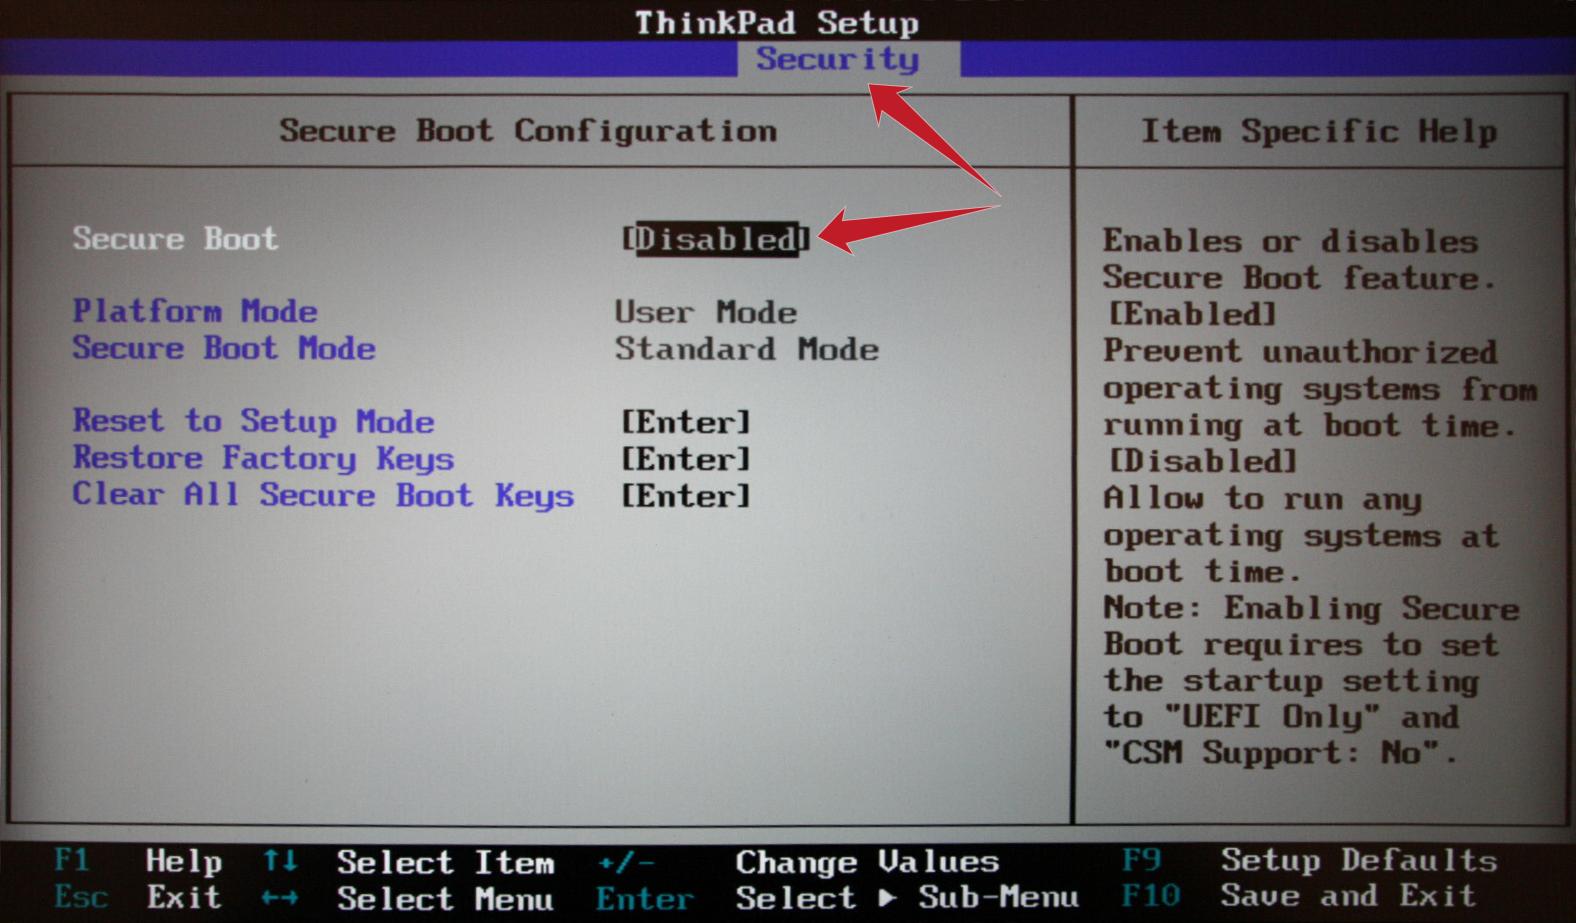
- Now, right when the PC starts and the first picture appears on screen, you have to press the key for open the boot options menu. Again every manufacturer does their own thing, but they usually show each option shortly on the bottom of the screen. Usually it’s between F9 to F12. When opening you should ne able to see your stick and boot from. In case you got your stick twice, always prefer the option with “UEFI” in it as the other one is an older boot mode.
- You should now see either the Ventoy selection menu or bootmenu of your distro. Have fun playing around!
Pingback:Great guide for folks willing to escape to freedom! – Thomas A. Besand
You could add hacktivista.com which is actually only shipping within Chile but is thinking on expanding to latinamerica.